10 Off-Grid Solar System Tips for Buyers

An Off-Grid Solar System must meet your actual needs, not just look impressive on a sales sheet. A remote cabin, workshop, or full-time home can have very different energy demands. List essential loads, such as a refrigerator, water pump, lights, and communications equipment. Note how many hours each runs, and check appliances for startup surges. Small details matter. A pump that runs briefly may still draw a sharp burst of power.

This guide shares ten practical tips for buyers comparing panels, batteries, inverters, and system designs. It explains why winter sunlight, roof or ground space, battery temperature limits, and future expansion deserve attention. Ask installers for clear assumptions, equipment specifications, and realistic production estimates for your location. Check warranties and confirm that the components work together. A backup generator may also make sense where cloudy stretches are common. Even careful estimates are imperfect. A tidy spreadsheet can miss a new freezer or a longer pump cycle. That is worth admitting before purchase. Use the tips to question optimistic promises, compare complete system costs, and choose equipment that fits your daily routine—not an idealized one.
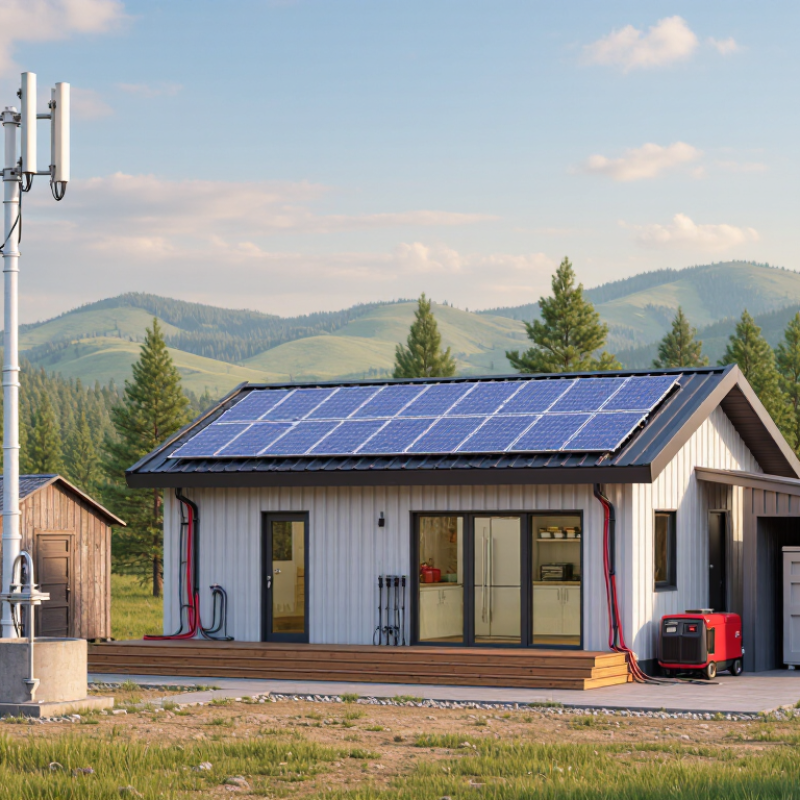
10 Off-Grid Solar System Tips for Buyers

Define Your Off-Grid Energy Needs and Usage Patterns

Before choosing an off-grid solar system, list what you need to power on an ordinary day. Include lights, a refrigerator, a water pump, cooking appliances, communication devices, and workshop tools. Note each item’s wattage and hours of use. A 60-watt light used for five hours consumes about 300 watt-hours. Small loads add up.

Pay special attention to equipment that runs briefly but draws a lot of power, such as pumps or compressors. Their startup demand can affect inverter sizing, even when daily energy use seems modest. Check appliance labels or manuals instead of relying on memory. That matters. I still find evening use easy to underestimate: lights, cooking, and device charging often overlap just as solar production fades.

Track your use for several days, including weekends and colder weather. Record when appliances run, not just how many you own. Note seasonal changes too; a cabin used in summer may have different heating or lighting needs in winter. Write it down. Then estimate your daily energy in watt-hours and consider how many low-sun days you want to manage. Cloudy weeks happen. Your estimate will not be perfect, and that is worth admitting. Build in a reasonable margin, but avoid sizing from imagined worst cases alone.


Evaluate Your Site’s Sunlight and Installation Conditions

Evaluate Your Site’s Sunlight and Installation Conditions

Before choosing an off-grid solar system, observe your property at different times of day. A roof that looks sunny at noon may be shaded by a chimney in the morning. Nearby trees can also cast longer shadows in winter. Clear at noon. Note when shade crosses the proposed panel area, and check whether planned tree growth could change that pattern.

Tips: Use a simple site sketch to mark roof direction, obstructions, and possible panel locations. Take photos in the morning, midday, and late afternoon. Repeat the check in another season if possible. These observations help set realistic expectations; they do not replace a professional solar assessment.

Check the installation surface as carefully as the sunlight. Roof age, available space, pitch, and access can affect the work and the final layout. For a ground-mounted array, look for stable, open ground and a route for cables that avoids routine foot traffic. Do not assume a flat, sunny patch is automatically suitable. Drainage, soil conditions, and distance from the home matter too. I would rather revise a rough plan early than discover an awkward cable run after equipment arrives. Ask a qualified installer to assess structural and electrical requirements before settling on system size.

10 Off-Grid Solar System Tips for Buyers: Evaluate Your Site’s Sunlight and Installation Conditions

Site Factor What to Evaluate Practical Guidance Buyer Action
Seasonal sunlight Compare solar resource estimates for the site across the year, especially during the lowest-sun months. Solar production varies by location, season, weather, and system orientation. Annual averages can hide winter shortfalls. Use monthly solar data for your location and size the system around the least productive period your loads must cover.
Shading throughout the day Check for trees, chimneys, ridges, nearby buildings, and other obstructions from morning through late afternoon. Shade on even part of an array can reduce output; the effect depends on the system design and how modules are connected. Inspect the proposed array area at different times and seasons. Ask for a shade analysis before finalizing the layout.
Array orientation Identify which roof or ground-mount directions have the best unobstructed exposure. In the Northern Hemisphere, south-facing arrays often provide strong annual production, but east- or west-facing layouts may suit a site’s conditions and usage. Compare estimated production for each feasible orientation rather than assuming one direction is always best.
Tilt and roof geometry Record roof pitch, available mounting area, and whether panels can be positioned at a useful angle. Suitable tilt depends on latitude, seasonal priorities, roof design, wind exposure, and local requirements. Request a layout and production estimate that uses the actual roof pitch or proposed ground-mount tilt.
Usable array area Measure clear space while accounting for roof edges, vents, skylights, walkways, and required access clearances. The total roof area is not the same as the safely usable area for modules and mounting hardware. Have the installer verify dimensions and setbacks, and confirm that the layout leaves required service access.
Roof condition and structure Check roof age, surface condition, framing, and whether the structure can support the planned equipment. Adding an array to a roof that needs near-term replacement can lead to extra removal and reinstallation work. Arrange a roof and structural assessment before installation; plan repairs or replacement first if needed.
Ground-mount conditions Assess soil, slope, drainage, access for equipment, and distance from the array to the building. Ground mounts need a suitable foundation and can require trenching for electrical runs; site conditions affect cost and design. Ask for an on-site review of the foundation approach, cable route, drainage, and any excavation needs.
Snow, wind, and weather Consider local snow loads, wind exposure, heavy rain, coastal conditions, and other site-specific weather. Mounting and electrical equipment must be appropriate for local conditions and applicable codes. Confirm that the design and equipment ratings meet local requirements and that snow or storm access is considered.
Battery location and temperature Choose a dry, secure, accessible location with suitable ventilation and temperatures for the selected battery type. Battery performance and permitted operating temperatures vary by chemistry and model. Extreme heat or cold can affect operation and service life. Check the battery manufacturer’s temperature and installation requirements, and include any needed protection in the design.
Distance, wiring, and equipment placement Map the route between panels, charge equipment, batteries, and loads; identify indoor and outdoor equipment locations. Long cable runs can increase wiring needs and electrical losses. Equipment placement must also allow safe access and comply with code. Request a site-specific wiring plan, equipment-location plan, and estimate that includes cable routes and installation details.

Size the Solar Panels, Batteries, and Inverter

Tip: Size the system from measured daily use, not a guess about your future needs. List each appliance, its watts, and hours of use; multiply watts by hours to estimate watt-hours. Add the results for one day. A fridge cycling overnight is different from a heater running continuously. Small loads add up. Check actual labels where possible, and leave a little room for changing habits.

Tip: Choose solar-panel capacity using daily energy use and your location’s average peak-sun hours. Divide daily watt-hours by sun hours, then allow extra capacity for heat, cloudy weather, and system losses. For example, 2,000 watt-hours across four peak-sun hours suggests at least 500 watts before adjustments. That estimate is imperfect. Seasonal sunlight can vary sharply, so check winter conditions rather than relying on a sunny month.

Tip: Battery capacity should cover the nights and cloudy periods you expect. Divide required stored energy by the battery’s usable fraction, then account for inverter losses if powering AC appliances. An inverter must handle both continuous load and brief startup surges from motors, such as pumps. Add the running watts of devices used at the same time. Leave room. Oversizing everything costs money, but a tight design can become frustrating when one extra appliance changes the load.

Compare Component Quality, Compatibility, and Warranty

An off-grid system is only as dependable as its weakest component. Compare more than panel wattage: check the battery’s usable capacity, inverter continuous output, and charge-controller limits. Ask for model-specific datasheets, not just a sales estimate. Small details matter. A cloudy week can expose a battery bank sized only for ideal sun, while a pump’s startup surge can trip an undersized inverter.

Compatibility is a system-level question. Match battery chemistry and voltage to the inverter and controller settings, then verify maximum charge current and allowed temperature range. Confirm that connectors, cable gauge, and protection devices suit the expected current and cable length. If a seller says components “should work,” request written confirmation or a wiring diagram. Specs can look close and still conflict.

Warranty terms deserve the same scrutiny as performance. Check coverage length for each component, who handles shipping, labor, and troubleshooting, and whether registration or approved installation is required. Read exclusions for deep discharge, heat, water ingress, or ordinary capacity fade. I would not treat the longest warranty as an automatic win; a slow response or unclear service process can matter more. Save dated invoices, serial numbers, and the final configuration sheet. Buyers often overlook that paperwork.

Check Installation Costs, Safety Standards, and Ongoing Support

An off-grid quote should separate panels, batteries, inverter, mounting, wiring, permits, and labor. NREL’s 2023 U.S. cost benchmark estimated a residential solar-plus-storage system at about $4.50 per watt of direct-current capacity. It is a useful comparison, not an off-grid price guarantee. Remote sites may need extra trenching, delivery, or backup generation. Ask for an itemized estimate and the assumptions behind it. Watch the small costs.

Tips: Request equipment specifications and written safety documentation. UL 9540 covers energy storage systems and equipment; confirm the proposed system’s certification and local installation requirements. Ask where batteries will sit, how cables are protected, and what clearances are needed. Have the installer explain shutdown steps in plain language. Paperwork matters.

Before signing, check who handles monitoring alerts, repairs, and replacement parts after installation. Get response times and labor charges in writing, along with separate warranty terms for batteries, inverters, and workmanship. NREL’s operations-and-maintenance guidance emphasizes planned inspections and recordkeeping for reliable solar performance. Off-grid owners should also ask how capacity will be checked over time. A neat spreadsheet helps, but it can miss a muddy access road or a battery’s real winter performance. Include those uncertainties in your decision.

Start typing and press Enter to search